Hawaii Mom Blog: afterschool snacks

THE LATEST

Showing posts with label afterschool snacks. Show all posts

June 12, 2025

Another Breakfast Muffin Recipe


Here is another breakfast muffin recipe that is yummy and packed with nutrients:

Breakfast Muffins

Ingredients

  • 1 c vanilla soy milk
  • 1 c old-fashioned oats
  • 1 egg
  • 1/4 c vegetable oil
  • 1 c flour
  • 1/4 c organic coconut sugar
  • 2 t baking powder
  • 1/4 c chia seeds
  • 1/4 c ground flax seeds
  • 1 c chocolate chips
  • 2 T protein powder (I used Truvani Banana Cinnamon)

Directions

  • Preheat oven to 350 degrees F.
  • In a small bowl, combine milk and oats.
  • Mix in the sugar, egg, and oil.
  • In a small separate bowl, combine the flour and baking powder.
  • Stir flour mixture into oatmeal mixture.
  • Stir in the flax seed, chia seeds, chocolate chips, and protein powder.
  • Pour batter into prepared muffin cups until they are 2/3 full.
  • Bake for 15-17 minutes, until a toothpick inserted into the center of a muffin comes out clean.

It's also perfect for afterschool snack or even dessert! 


Read More

March 15, 2017

Chocolate and Granola-Covered Banana Pops

These Chocolate and Granola-Covered Banana Pops are an easy, yummy treat to make for an after school snack, or even dessert!

 All you do is dip 1-inch slices of banana into melted chocolate, and cover with granola!

I sliced up two bananas, and dipped in 3 squares of melted almond bark (microwaved on high for 60 seconds; I still had lots of chocolate left over, so you could try and melt just 2 squares).  I then used a 1/4 cup of granola to sprinkle on each pop.

Refrigerate for at least 15 minutes before serving.

Easy!
The granola gives a nice texture to the yummy banana pops!


Read More

November 17, 2016

Recipe: Roasted Kabocha


I love kabocha! It's moist, tender, sweet, and its taste resembles a cross between sweet potato and pumpkin. It is packed with nutrients such as beta carotene, iron, potassium, and vitamin C. 

I recently discovered a new way to enjoy kabocha - ROASTING!  It's easy and HEALTHY!

1.  Cut the kabocha in half and scoop out the seeds. Then cut into slices of desired thickness.  Lay on a baking sheet (I use parchment paper for easier clean-up).

2. Drizzle with olive oil, then sprinkle on sea salt or Himalayan salt, and pepper.  


3. Bake at 400 degrees for 30 minutes. 


And that's it!

Serve it as a healthy snack, appetizer, or side dish to a meal.

Recipe adapted from Jennifer Che's Oven Roasted Kabocha Squash


Read More

November 8, 2016

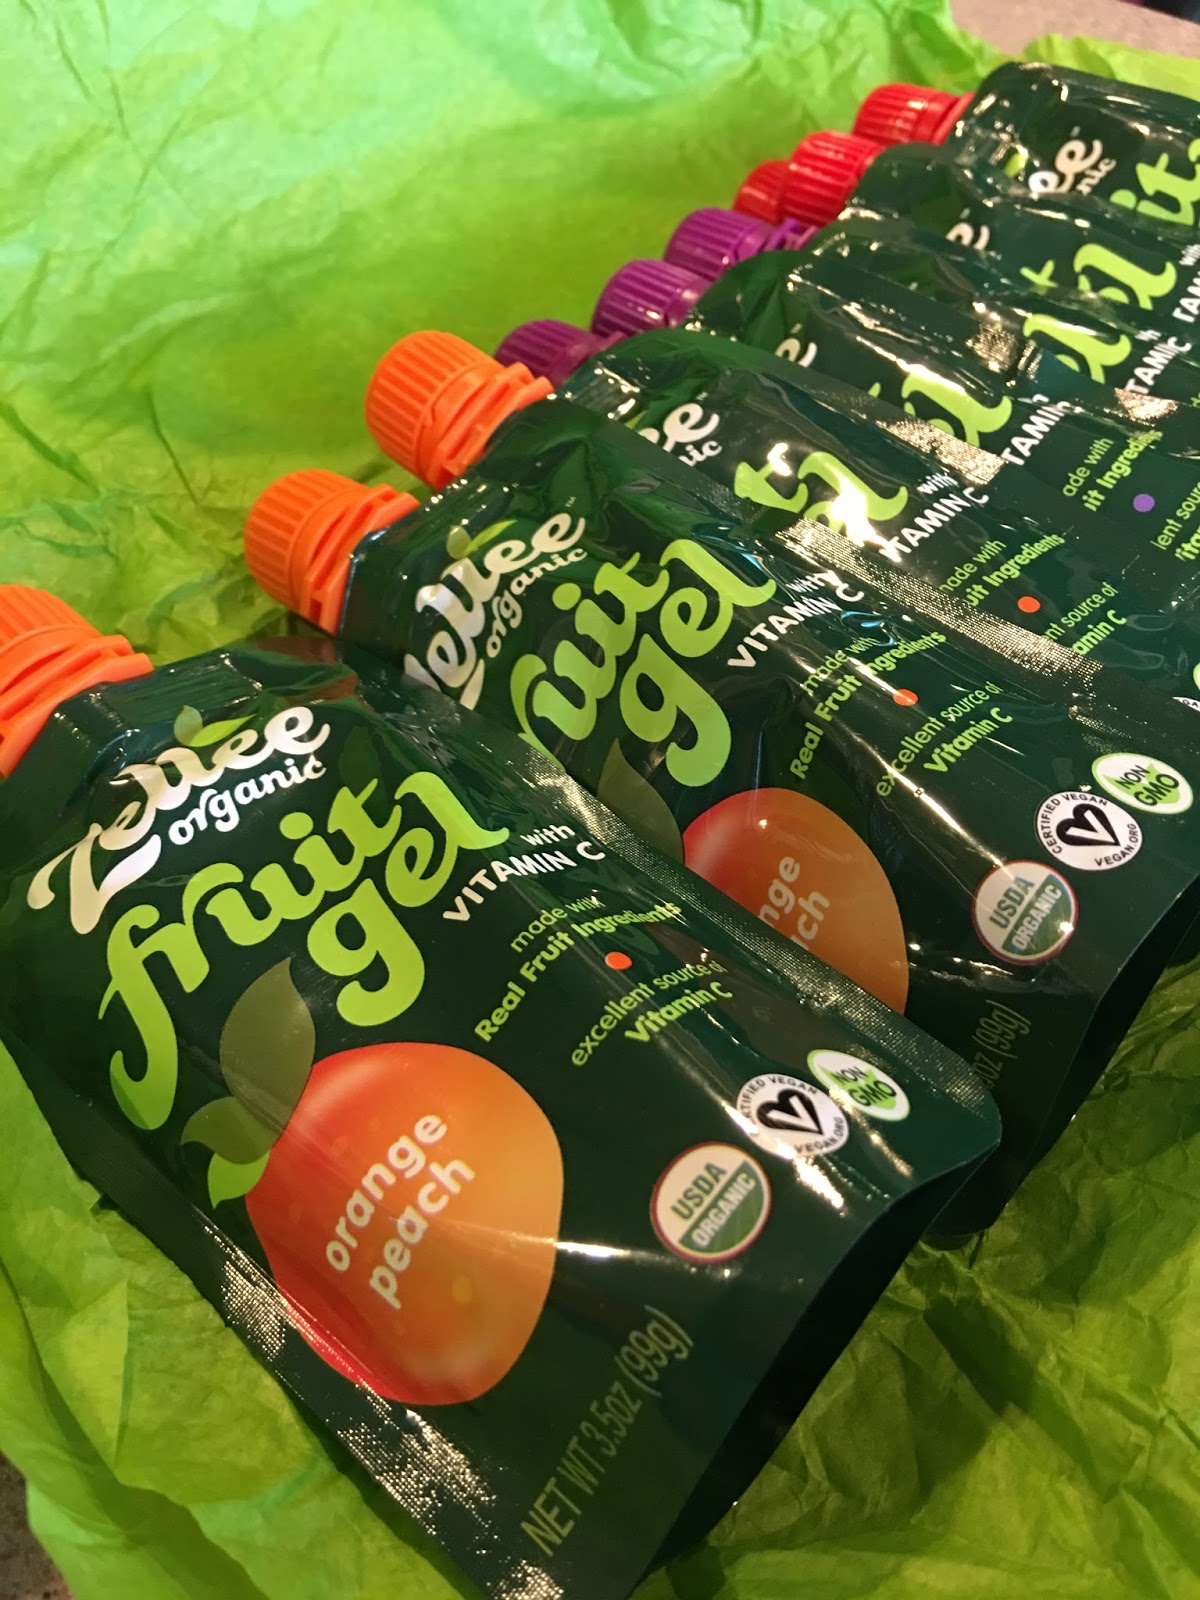
Zellee Organic Fruit Gel


Disclosure: Complimentary Zellee Fruit Gel samples received for review purposes.


Fruit pouches are a mom's best friend. They are convenient, mess-free, and a healthy form of snacks for kids of almost any age.  Don't get me wrong, there's no substitute for real food (i.e. real fruits or veggies), but if you're a parent, you'll know that it's not always so easy to get your toddler to eat, and sometimes it's better that your toddler eat something versus nothing at all, because when toddlers get hungry and frustrated, they turn into lil monsters!

There is a plethora of fruit pouches on the market - the trick is to find the ones that your little ones love to eat.  If you're like me and have picky eaters, you'll want to pay close attention to this particular line of fruit pouches that I'm going to share with you today!

It's made by a brand called Zellee, located on the island of Maui. The company's founder is a mom herself, and she came up with the idea of putting jello into pouches for fun and on-the-go enjoyment!

Zellee Organic fruit gel pouches are:
  • organic and non-GMO
  • contain no added sugar, color or artificial ingredients
  • vegan
  • naturally gluten-free
  • contain none of the 8 major allergens
  • only 60-70 calories and 0% fat
  • provide 100% daily value of vitamin C


They recently sent me a sample of each of the their flavors:


Orange peach, blueberry grape, and strawberry pear.


Before I could even put these into the refrigerator (these pouches are best consumed chilled), my boys wanted to try them.  I can honestly say that they've never been this excited to eat fruit pouches before.

After about an hour, I couldn't hold off my boys any longer, and we cracked open a couple of pouches for them to try.  

The verdict? 


They loved it! They liked the novelty of eating "jello" from a pouch, and the flavors were all agreeable to them. Brother B actually ate three in one sitting!  

I should note that the consistency is firmer than most fruit pouches, which explains why the spout is wider than usual, therefore, these pouches are better suited for toddlers versus babies.  But if you want to feed these to your babies you could always squeeze the gels onto a spoon or into a bowl.

If you're in Hawaii, you can find Zellee Organic Fruit Gel pouches at:

Oahu
Down to Earth
Whole Foods - Kahala
Whole Foods - Kailua 


Maui
Alive and Well - Kahului
Down to Earth - Kahului
Mana Foods - Paia
Rodeo General Store - Makawao
Whole Foods - Kahului


Big Island
Island Naturals - Hilo Shopping Center

Also available in California, Idaho, Oregon, Montana, Washington, or on their website.

Zelle Organic
Visit: www.zellee.com 
Follow:  @zelleeorganic


Read More

October 3, 2016

Smiley Apple Snacks

These Smiley Apple Snacks are a fun afterschool snack or Halloween treat!

Simply take sliced apples and spread peanut butter on each slice.

Then take mini marshmallows and place them on one peanut butter-covered apple slice, and place another peanut butter-covered apple slice on top of the marshmallows (pb side down).

I used chunky pb, which made the smiles look messy and a little gross - suitable for Halloween!  You could even leave out a marshmallow or two to make the "smiles" even sillier.

Such a fun way to eat apples!
Read More

August 4, 2016

DIY Apple Snacks

In my effort in trying to get my kids to eat more fruits and veggies, I filled up a muffin tin with apple slices (one of their least favorite fruits) and other goodies - peanut butter, shredded coconut, chocolate chips, and graham crackers, with hopes that they would get excited about eating apples.


It worked!

Each of my kids had fun dipping and decorating each apple slice.

The kids ate the apples for dessert one night, but they'd also make a perfect afterschool snack.

The use of the muffin tin just makes the whole process a lot more fun.  You could also use paper or silicone muffin tin liners, or other fun and colorful cups or containers to hold all the ingredients.

And as for toppings - the options are limitless!  You could use nuts, butterscotch chips, sprinkles, Nutella, and more!

Ideally, my kids would eat the apples plain, but this was a great way to get them eating any apples at all!


Read More

July 29, 2016

Recipes for National Cheesecake Day (July 30, 2016)

National Cheesecake Day is just around the corner! Celebrate with friends and family by baking this easy recipe by Kraft called "Cupid's Cherry Cheesecake".  

All you need to bake these cherry cheesecakes are:

Box of Nilla Wafers (regular size, not the minis)
2 Boxes Cream Cheese
Sugar
2 Eggs
Muffin liners
1 Can of Cherry Pie filling


Start by preheating your oven to 350 degrees.

Line your muffin tray with liners.  Place one Nilla wafer in each liner.


Using a mixer, cream 2 blocks of cream cheese with 3/4 cups of sugar. Add eggs one at a time.


Fill each liner with the cream cheese mixture, about 2/3 of the way full.


Bake at 350 degrees for 30 minutes


Turn off the oven, crack open the door, and let the cheesecakes sit in there for another 30 minutes.


Remove from the oven and allow the cheesecakes to cool completely.  Top with Cherry pie filling (blueberry or strawberry pie filling also works!).  Enjoy!

Be sure to refrigerate your leftover cheesecakes (if there are any!).  You can also serve them cold, which is my personal preference!


Click here for the original recipe!

Here are a few other awesome cheesecake recipes to try, posted by Gem, the queen of bar recipes:

Lemon Cheesecake Bars

Chocolate Covered Oreo Cheesecake Bars

Cookie Dough Cheesecake Bars


Read More

July 25, 2016

Oreo Peanut Butter Brownie Recipe

The other day I was browsing through Gem's Twitter feed, and I came across this tweet from @SarahBMock that she retweeted: 


Everything about this recipe was calling my name - brownies, peanut butter, and oreos!

Gem suggested that I make it for our next get-together, but I couldn't wait that long, so I made it that very night. :)

Although @SarahBMock used traditional Oreos in her recipe, I only had the Reese's Mini Oreos on hand (thanks to Gem!) so I used those instead, placing two in each muffin liner.


Then I put a small dollop of peanut butter on top of each Oreo...


and then placed two more Oreos on top of each dollop of peanut butter.


I made my brownie mix, then placed about  2 1/2 Tablespoons of brownie batter into each muffin liner.


After baking them at 350 degrees for 20 minutes, they were done!


My brownies did not come out as pretty as @SarahBMock's, but trust me, they were delicious!! Oreos come in many different flavors now, and I'm sure any flavor will work wonderfully.

Since I made these for my hubby's office, I dusted them with Confectioner's sugar to make them look a little more presentable.


Click here for @SarahBMock's original recipe. 
Read More

June 21, 2016

Mango Bread Muffins


Mango season is upon us! It's hard to miss this wonderful season when your Instagram feed explodes with picture after picture of this versatile fruit.  There are many ways to cook or bake with mangoes; my favorite way to use them is to make bread out of them.  

Gem posted a great recipe for mini mango muffins a couple of years ago, and I really wanted to try that recipe since she mentioned that her picky son loved them, but I didn't have shredded coconut in my pantry, so I hit the internet and followed an easy mango bread recipe to make these mango bread muffins that you see pictured above.  I added raisins to the recipe since one of my sons loves raisins, although my other son who doesn't care for raisins picked them out. :)

Here's what you do:

Combine your dry ingredients
  • 2 cups flour
  • 2 teaspoons baking soda
  • 1 cup sugar
  • 2 teaspoons cinnamon
Combine your wet ingredients in a separate bowl
  • 3 eggs
  • 1 teaspoon vanilla extract
  • 1 block of butter, melted
  • 1/4 cup oil
Add your dry ingredients to your wet ingredients and mix well. Fold in approximately 4 cups of chopped mangos. Optional: raisins (I used about 1/2 a cup).

Fill lined muffin pan with batter (about 3/4 full).  Bake at 350 degrees for about 25 minutes.    Yields 22 muffins.

Click here to see the recipe I followed.
   
Read More

May 17, 2016

REESE'S Peanut Butter Temptations Recipe


Tomorrow is NATIONAL I LOVE REESE'S DAY! Since I'm meeting my blog boss Gem (who is a HUGE fan of REESE'S peanut butter cups) for lunch today, I baked her these REESE'S Peanut Butter Cup Temptations using a recipe that I found on the REESE'S website


It only took me 30 minutes from start to finish, and here's how I did it:

1) Preheat oven to 375 degrees.  Line muffin pan with paper liners (original recipe calls for mini muffin pans but I used regular muffin pans since that's all I have). Unwrap REESE'S peanut butter cup miniatures and set aside.

2) Using an electric mixer, mix 1 stick of unsalted butter, 1/2 cup brown sugar, 1/2 white sugar, 1/2 cup peanut butter (REESE'S is preferred but any brand will do), 1 egg and 1/2 tsp vanilla extract in a large bowl.

3) In a separate bowl measure out 1 1/2 cups of flour, 3/4 tsp baking soda, 1/2 tsp salt

4) Gradually add in the dry ingredients (#3) to the wet ingredients (#2).

5) Scoop 1-inch balls into each paper liner (my balls were slightly larger since I used regular sized muffin liners)

6) Bake for 10-12 minutes if you're using a mini muffin pan; 15 minutes if you're using a regular muffin pan.  Bake times may vary so keep an eye on it.

7) Remove from oven and immediately press one REESE'S peanut butter cup into each cookie.  (I only used about half of a 12 oz bag of peanut butter cup miniatures.) 


As you can see, there is a lot of cookie when you use a regular size muffin pan.  Now I can see why the recipe calls for mini muffin pans. But don't get me wrong - the cookies were still delicious and I can't wait to get Gem's honest feedback on them. 


Click here to go to the actual recipe on the REESE'S website.

My Stats:
Number of Ingredients: 10 (the bag of miniatures counts as one ingredient)
Total time: 30 minutes
Yield: 16 cookies
Read More

August 18, 2015

Sugar Bowl Bakery Organic Petite Brownie Bites Review

Disclosure: Complimentary product was provided for review purposes.  Some links are affiliate.

Our family is no stranger to Sugar Bowl Bakery.  I'd buy their Petite Brownie Bites from our local warehouse club stores for gatherings and they were always a hit!

When I found out they made Organic Brownie Bites, I couldn't wait to give them a try!


We recently received a generous 3lb container full of Sugar Bowl Bakery's Petite Organic Brownie Bites.


These Sugar Bowl Bakery Organic Brownie Bites may be petite, but they are sure big on taste!


I am always wary of buying brownies from the store, fearing they'll be dried out and tasteless, but each Sugary Bowl Bakery Organic Petite Brownie Bite was full of chewy, chocolaty, goodness. 
My kiddos were so excited to eat them for an afterschool snack.

They enjoyed them so much, that they asked for the Brownie Bites to be packed in their home lunch!

And I happily agreed, since after all, the Organic Brownie Bites are made with ingredients like organic cane sugar, organic unbleached flour, and organic cocoa powder.  They contain no GMOs, no preservatives, and no artificial colors or flavors.

Sugar Bowl Bakery's Organic Petite Brownie Bites make a great snack or dessert!

I also can't wait to try this Chocolate Molten Lava Brownie Bites recipe!

To find out where you can buy Sugar Bowl Bakery Organic Petite Brownie Bites, click here.
Read More

June 29, 2015

Graham Cracker Energy Bites Recipe

Energy Bites are super easy to make, and you can really use all sorts of ingredients in them.

I've made ones with peanut butter and ones with Nutella, and after seeing rainydaybites' (one of my favorite food bloggers on IG!) energy bites photo on Instagram, I decided to make some rolled in sesame seeds.

I simply use the No-Bake Energy Bites recipe and rolled the balls in sesame seeds.

And since I had three boxes of graham crackers that were about to expire soon, I made another batch of energy bites using graham cracker crumbs instead of oats, and then rolled in coconut.  I really liked this variety - the graham crackers, chocolate, and peanut butter made for a great combo!

Graham Cracker Energy Bites
Ingredients:
  • 1 c graham cracker crumbs
  • 1/2 c peanut butter
  • 1/2 c ground flaxseed
  • 1/2 c chocolate chips
  • 1/3 cup honey
  • 1 t vanilla extract
  • 1/2 c sweetened coconut flakes
Directions:
  • Mix all ingredient together (except the coconut flakes) in a medium bowl.
  • Refrigerate mixture for at least an hour.
  • Roll mixture into 1" balls.
  • Roll balls into coconut flakes.
Read More

February 27, 2015

Granola Bars Recipe

I recently made these Granola Bars based on this recipe from Allrecipes.com.  I've been giving them to my kids as an afterschool snack and also as a dessert.  The recipe is pretty versatile (e.g. I added chocolate chips and ground flax seed), and I'm sure I'll be making more granola bars using different ingredients.

Granola Bars (recipe adapted from Allrecipes.com)

Ingredients:
  • 2 c quick cooking oats
  • 1 c flour
  • 3/4 c packed brown sugar
  • 1/2 c raisins
  • 1/2 c chocolate chips
  • 1/2 cup ground flax seed
  • 1/2 t salt
  • 1/2 t ground cinnamon
  • 1/2 c chopped walnuts
  • 1/2 c vegetable oil
  • 1/2 c honey
  • 1 egg
  • 2 t vanilla extract
Directions:
  •  Preheat oven to 350 degrees F. 
  • Line a 9x13 inch baking pan with parchment paper.
  • In a large bowl, combine oats, flour, brown sugar, raisins, ground flax seed, salt, cinnamon, and walnuts. 
  • In a smaller bowl, mix together the oil, honey, egg, and vanilla; pour into the flour mixture, and mix by hand until the liquid is evenly distributed. 
  • Press mixture evenly into prepared baking pan and bake 25 to 30 minutes.
  • Cool completely in pan before cutting into bars.
Read More
The posts published on Hawaii Mom Blog are personal experiences and opinions only. Press releases and other information from business are shared if believed they may be of interest to Hawaii Mom Blog readers. Press releases/information from businesses do not reflect personal opinions. Unless otherwise specified, products are provided by the sponsor free of charge, and no monetary compensation is received. Hawaii Mom Blog assumes no liability for any malfunction, injury, or other loss or damage, whether direct, consequential, or incidental, arising out of services, companies, or products that have been featured, reviewed, given away, advertised, or written about on Hawaii Mom Blog. Click here for the Terms of Use.