Hawaii Mom Blog: pantry challenge

THE LATEST

Showing posts with label pantry challenge. Show all posts

July 14, 2020

Shelter in Place Cooking / Pantry Raid: Chili Mac Pie

Here is another quick and easy dinner using pantry and refrigerator staples - just three ingredients!

Boil 2 cups of macaroni per package directions, place cooked macaroni into a glass pie plate, top with one can of chili, 1/2 c shredded cheddar cheese, and bake at 350-degrees Fahrenheit for 15 minutes!

Garnish with green onions (optional), and you have a simple, pantry-clean-out dinner!
Read More

July 10, 2020

Tuna Patties

In trying to clean out the pantry, I decided to make tuna patties, with cans of tuna I found in the back of our pantry.

They are very easy to make (just like the Salmon Patties)!

I simply took two 7oz cans of tuna (in water), 2 eggs, 1 cup panko, and 1 t ea salt and pepper, and mixed everything together.

I formed the mixture into patties, then pan-fried them on each side until golden brown.

Eat it with dill sauce and with rice, or make into bigger patties for a tuna burger.


Read More

April 17, 2020

Shelter-in-Place Cooking: Tuna Casserole

I'm running out of ideas (and groceries!) for dinner.  So I whipped up a Tuna Casserole with some staples.

I cooked a box of shells & cheese according to package directions.  Then I placed the shells & cheese in a pie dish, stirred in 2 cans of tuna (drained), topped with 5 slices of American cheese, and a dozen crushed Ritz crackers.

I baked it at 350°F for 15 minutes.

It was a super easy meal that has turned into a fave of my youngest!
Read More

May 10, 2017

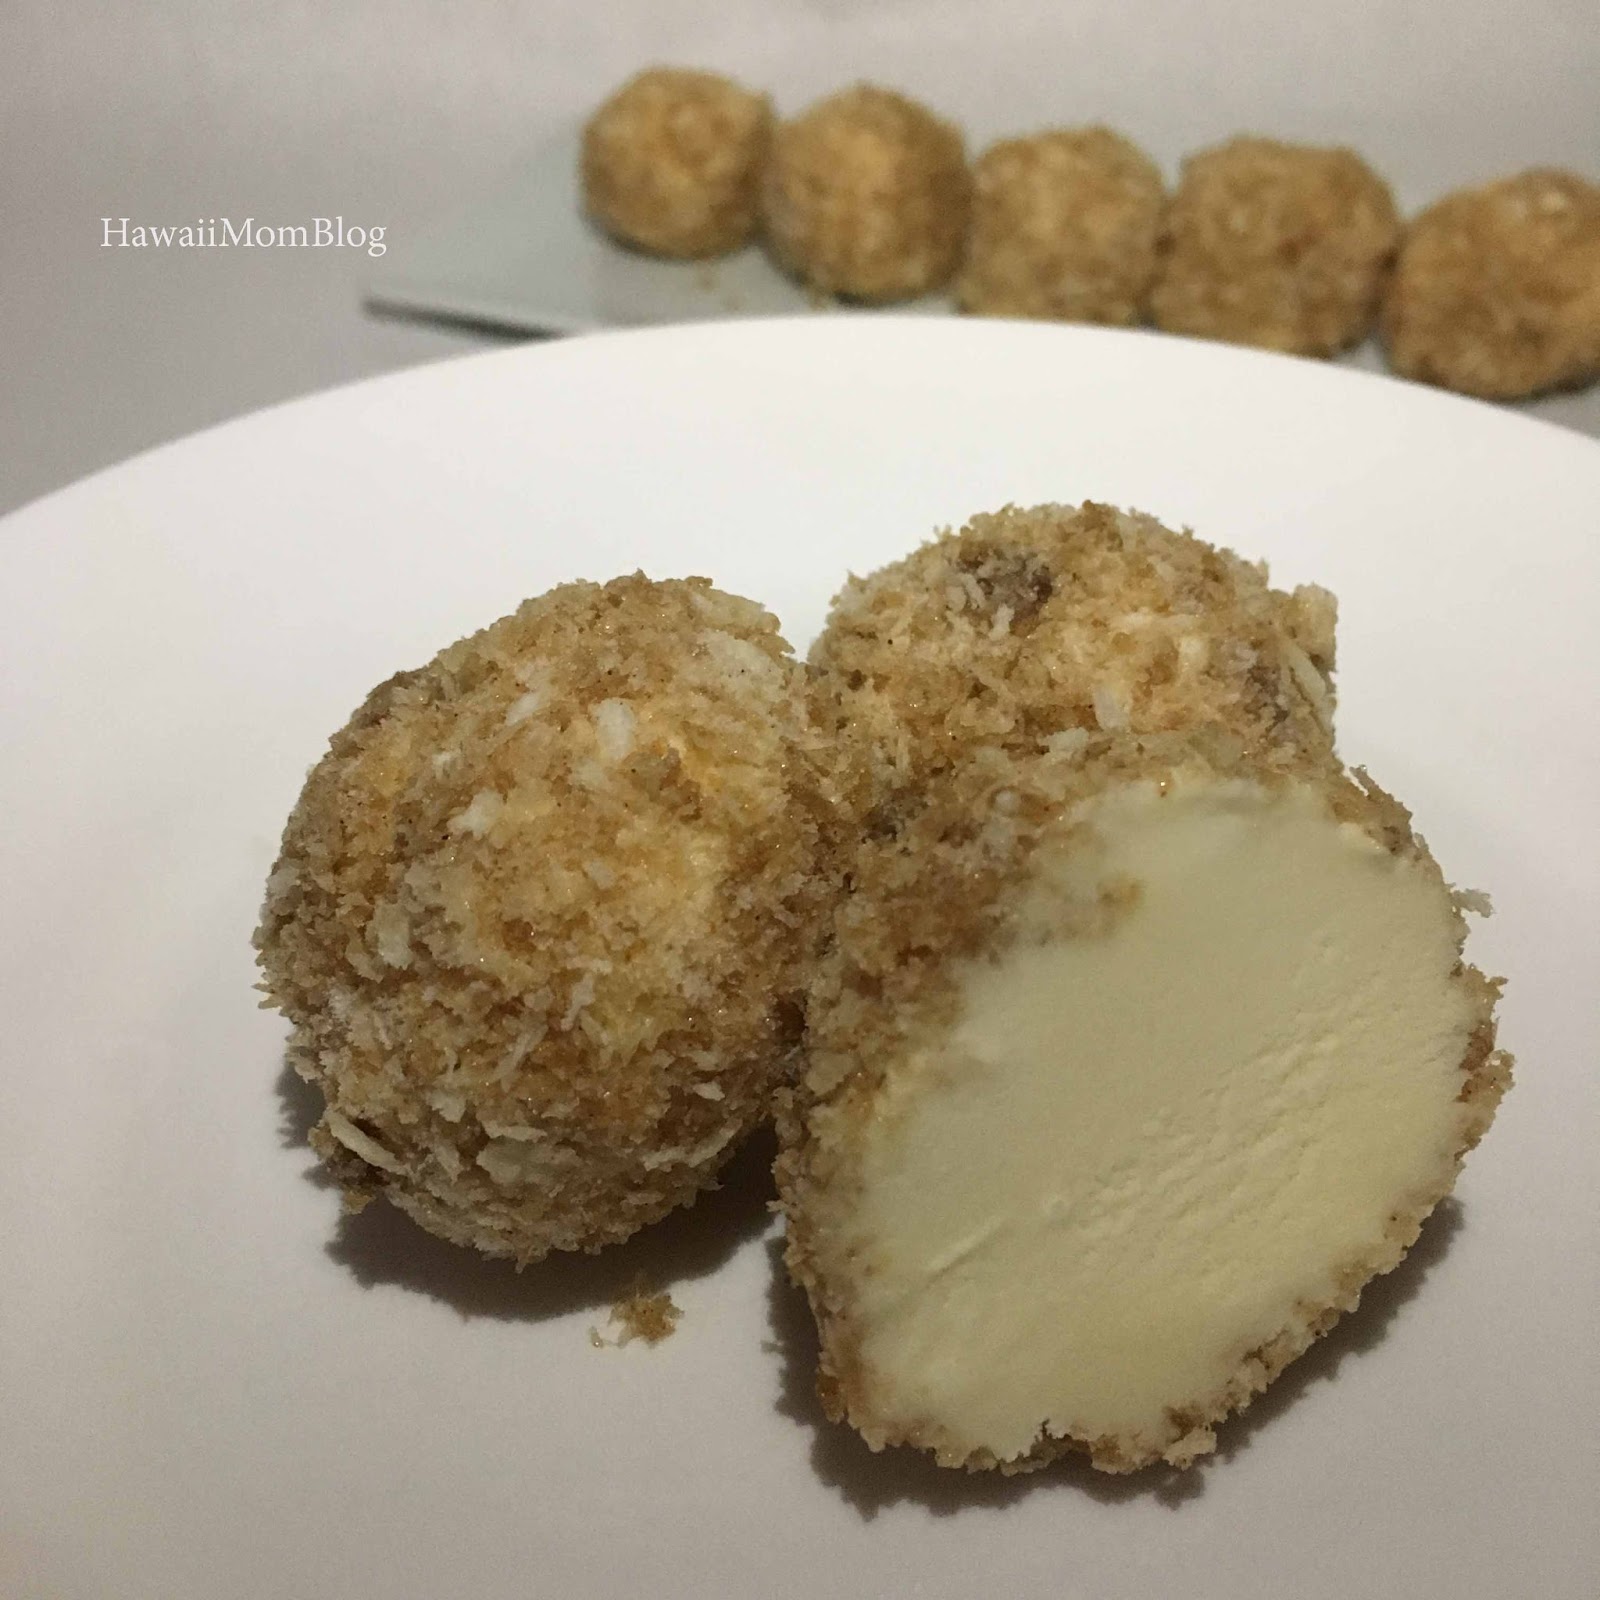
Unfried Ice Cream Bites

After having bought a huge tub of vanilla ice cream, I searched for recipes that I could use up some of the leftover ice cream in.

I stumbled upon a recipe for Unfried Ice Cream, which used a panko coating to give the ice cream a nice, crunchy texture.

I had all of the ingredients on hand, which are pretty much just pantry staples, and went to work on making these ice cream balls.

The original recipe called for 3 cups of panko, but I only used 2.

The process of making the ice cream balls and rolling them into the panko can get quite messy, but it was worth it when I saw how much the kids loved the ice cream bites (especially when drizzled with chocolate and topped with whipped cream!).

They are great on their own though - the crispy, cinnamon-y coating is delish!


Unfried Ice Cream Bites

Ingredients:
  • 1/2 gal vanilla ice cream
  • 2 c panko
  • 1/2 c firmly packed light brown sugar
  • 1/4 c butter, melted
  • 2 t cinnamon
  • 1 T granulated sugar
Directions:
  1. Mix the brown sugar, sugar, and cinnamon into the melted butter.
  2. Fold in the panko.
  3. Let mixture cool for 5 minutes.
  4. Scoop ice cream into balls and roll into panko mixture. 
  5. Place balls onto parchment-lined baking sheet and freeze for at least 15 minutes before serving.
  6. Top with your favorite toppings.  

To view the original recipe on the Kikkoman website, click here.
Read More

April 25, 2017

Pecan Praline Blondies

I love blondies, and since I had a bunch of pecans, I decided to make Pecan Praline Blondies.

These Pecan Praline Blondies are a great way to use up pantry items.

With just a few basic ingredients you most likely have on hand, you can whip up a batch of these tasty blondies.

The original recipe calls for heating the butter and brown sugar on the stovetop, but being the impatient person that I am, I just heated the butter and brown sugar in the microwave.

The end result was a sweet, chewy, nutty blondie.  Easy and delicious!

Pecan Praline Blondies

Ingredients:
  • 1 c butter
  • 2 c brown sugar
  • 2 eggs
  • 2 t vanilla extract
  • 1 1/4 c all purpose flour
  • 2 t baking powder
  • 2 c coarsely chopped pecans
Directions:
  • Preheat the oven to 350 degrees Fahrenheit.
  • In a microwave-safe bowl, heat butter and brown sugar on high for 2 minutes, stirring every 30 seconds.  
  • Cool for about 5 minutes, then add in egg and vanilla.  
  • Mix in flour, baking powder and salt.
  • Fold in pecans.
  • Pour batter into parchment-lined 9x13 pan.  
  • Bake for 25-30 minutes.
  • Cool completely before cutting into squares.

You can find the original recipe here on Chocolate, Chocolate and More.
Read More

February 7, 2017

Millionaire Bars

I've heard about Millionaire Bars before, and I've seen photos when I've searched online for simple desserts, and I finally made some the other day.

Millionaire Bars are basically shortbread, topped with a layer of caramel, then a layer of chocolate.

It's so good!  For those who are averse to caramel (like I once was), the caramel flavor is not too strong.

You probably have most, if not all, of the ingredients in your pantry and fridge!

Next time I'll sprinkle on a little sea salt for that extra special touch.

Millionaire Bars

Ingredients:
  • 1 c butter (2 sticks), divided
  • 1 c flour
  • 1/3 c sugar
  • 1/4 t salt
  • 1 14oz can sweetened condensed milk
  • 2 c chocolate chips
Directions: 
  • Preheat oven to 350 degrees Fahrenheit.
  • Make shortbread layer by combining flour, sugar, and salt.  Take 1 stick of butter and cut into pieces, and combine with flour mixture.  
  • Press mixture into bottom of 9x9 parchment-lined pan, and bake for approximately 21 minutes. 
  • Cool completely.
  • Prepare caramel by melting 1 stick of butter in microwave (approximately 90 seconds on high).
  • Pour in sweetened condensed milk, and whisk thoroughly.
  • Microwave for approximately 6 to 8 minutes, mixing every 30 seconds (it will eventually look stringy, but once you whisk it thoroughly it will become smooth).
  • Pour caramel over shortbread layer, and cool completely.
  • Melt 2 cups of chocolate chips in microwave for 60 seconds on high.
  • Pour over cooled caramel layer.
  • Chill for at least 30 minutes before cutting into squares.  
You can see the original recipe here on Center Cut Cook.
Read More

February 6, 2017

Pantry Challenge Fried Saimin

Another pantry challenge meal I made last month is Fried Saimin.

One of my relatives gave me a box full of pantry items for Christmas - instant saimin, SPAM, furikake, snacks, and more.  Thank goodness, because I used some of those items to make fried saimin.

You can use just about any kind of instant saimin or ramen.

The instant saimin I used had both a packet of soup base as well as liquid seasoning.

I decided to use just the liquid seasoning to make the fried saimin, but if you have just a soup base in your instant saimin, that'll work fine too.

I then added a variety of seasonings and garnishes.

You can follow the general recipe for Nat's popular Fried Saimin post (use the soup packet contents for the dashi), or I used a somewhat similar recipe below.

Pantry Challenge Fried Saimin

Ingredients:
  • 3 pkg (3 oz) instant ramen or saimin (the packages I used were 3.73 oz), boiled, drained, and rinsed
  • 2 T vegetable oil 
  • 2 T shoyu 
  • 2 T oyster sauce 
  • 1 pkg of instant ramen/saimin soup base (or 1 packet liquid seasoning, if your instant ramen/saimin includes it)
  • garnishes (SPAM, eggs, green onions, kamaboko, etc.). 
Directions:
  • In a skillet, heat oil and stir-fry noodles for 3-5 minutes. 
  • Add shoyu, oyster sauce, and soup base and mix well. 
  • Add garnishes and stir-fry for 3-5 more minutes, until noodles and garnishes are evenly coated. 
Read More

January 27, 2017

Chicken Tortilla Casserole

One of my Pantry Challenge dinners this month was a Chicken Tortilla Casserole.

I simply took some flour tortillas and cut them into fourths, layering them in the bottom of a 9x13 pan (I used 3 small tortillas total for the bottom layer).

I then spread some refried beans onto the tortillas, and then some chicken that I cooked in taco seasoning.  I sprinkled on some cheddar cheese, then repeated the tortillas, refried beans, chicken, and cheese layers.

I topped off the casserole with bottom-of-the-bag tortilla chips, more cheddar cheese, and olives.

I baked for 20 minutes at 350 degrees Fahrenheit.


I didn't have any sour cream, but I did have guacamole, which was a great finishing touch, along with some chopped green onions.

This recipe is a great way to use up pantry items - and all those broken chips in the bottom of the bag!

Chicken Tortilla Casserole

Ingredients:

  • 6 small flour tortillas cut into fourths
  • 1 16 oz can of refried beans
  • 1 pound chicken, cubed and cooked according to directions with 1 packet of taco seasoning
  • 1 1/2 c shredded cheddar cheese
  • 1 1/2 c tortilla chips, crushed
  • 1/4 c sliced olives
  • guacamole and green onions to garnish (optional)
Directions:
  • Layer half of the flour tortillas on the bottom of a 9x13 pan.
  • Spread with half of the refried beans
  • Top with half of the chicken and half cup of the cheddar cheese.
  • Repeat tortillas, beans, chicken, and cheese layers.
  • Top with crushed tortilla chips, remaining cheddar cheese, and olives
  • Bake at 350 degrees Fahrenheit for 20 minutes.
  • Serve with guacamole and green onions.
Read More

January 16, 2017

Mini SPAM Musubi


Earlier this month I put myself on a pantry challenge.  I'm trying to spend less money eating out by using up whatever I can in the pantry.

One of the first things I made on this pantry challenge is Mini SPAM Musubi.  They are mini, unlike the regular SPAM Musubi, because I had no nori / seaweed on hand!

I did, however, have Korean Seasoned Seaweed.


To make the mini SPAM musubis, first I sliced some Teriyaki SPAM, and then cut each slice into thirds.

I fried up the SPAM for a few minutes on each side until browned.

I then placed some rice in the bottom of musubi mold, sprinkled on some furikake, then placed three pieces of SPAM on top of the furikake.

After pressing through with the mold, I cut the musubi into thirds (where the SPAM was already cut). I then took a sheet of the Seasoned Seaweed and wrapped it around each mini musubi. The seaweed didn't wrap all the way around each musubi, but the musubis still held together.
The bite-size musubis are perfect for little ones, or for an appetizer!
Read More

January 2, 2017

Pantry Challenge

One of my goals this year is to spend less on groceries and eating out.  Too many times I find myself tossing expired foods, or simply being short on time, ingredients, or energy to cook, resulting in a trip to the nearest fast food restaurant.

Savvy parents with even decent cooking skills could easily whip up a fab meal with the ingredients they have on hand in their pantry, freezer, and fridge.

I, on the other hand, lack cooking skills, so this will definitely be a challenge in more ways than one.

But I am totally up for it!

If you have any pantry recipes you'd like to share, please let me know!

In the meantime, here are a few "pantry raid" recipes I've posted in the past:

Peanut Butter & Jelly Bars

Tuna Casserole
DIY Sundaes
SPAM Katsu

Happy New Year!
Read More
The posts published on Hawaii Mom Blog are personal experiences and opinions only. Press releases and other information from business are shared if believed they may be of interest to Hawaii Mom Blog readers. Press releases/information from businesses do not reflect personal opinions. Unless otherwise specified, products are provided by the sponsor free of charge, and no monetary compensation is received. Hawaii Mom Blog assumes no liability for any malfunction, injury, or other loss or damage, whether direct, consequential, or incidental, arising out of services, companies, or products that have been featured, reviewed, given away, advertised, or written about on Hawaii Mom Blog. Click here for the Terms of Use.